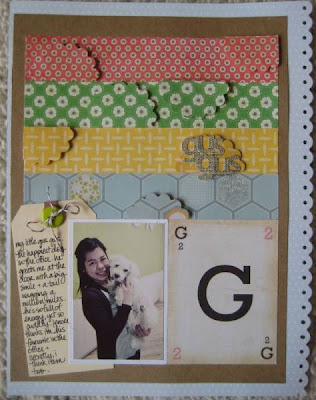
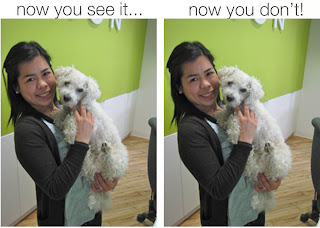
 Problem is, in the original photo I had a piece of hair sticking out that drove me nuts. See?
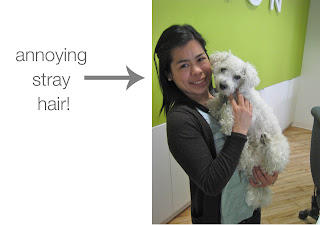
So I took the photo into Photoshop Elements and within 5 minutes was able to get rid of the stray hair. Here's how:
1) Open photo.
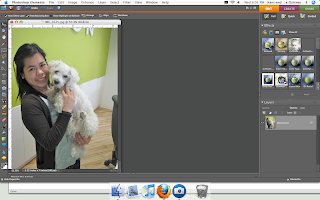
2) Select the 'clone stamp' tool in the toolbar.
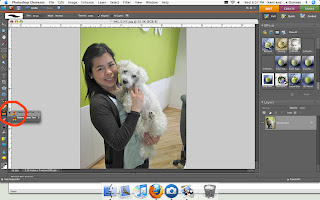 3. Choose an area of the photo that you want to 'clone' to cover up the item. In other words, for this picture, I wanted to clone the background. (If this makes no sense, hopefully these next few pictures will explain it.) Do this by putting your cursor over the area you want to clone and holding down ALT. Your circle should turn into a 'target' (basically a circle with a plus sign in it). Click once.
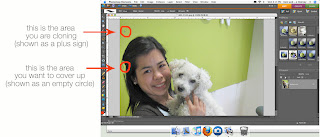
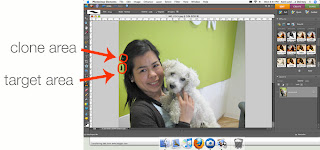
4) You'll notice that the area you want to clone is parallel to your targeted area - see how the plus sign is directly over the empty circle? When you choose an area to clone, keep this in mind. You'll want to choose an area that's relatively unobstructed. For example, if I was to drag my cursor down, you'll notice my cloned area move down as well. If I was to move my cursor too far down, it will start cloning my hair instead of the green wall behind me:
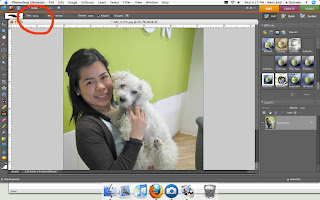
5. Now that you've selected your clone area, brush away to your heart's content by dragging your selected cursor over the item you want to cover up. I find it easier to zoom in on the area while doing this. If your circle is too big/not big enough, you can change the size at the top.
6) Voila! Annoying item gone.
It takes some trial and error the first few times, but it's easy to get the hang of! Let me know if you have any questions by leaving a comment or sending me a PM.

1 comment:
Great tutorial, Flo! TFS!
Post a Comment